Manage addons
Author: p | 2025-04-24
warcraft package-manager wow addons world-of-warcraft addon-manager addon-installer strongbox wow-addon-manager addon-updater wowinterface addon-managers supports-addons. Updated ; Clojure; Armaldio / construct-addon-installer. Sponsor Star 3. Code Issues Pull requests a World of Warcraft Addon Manager aimed at Linux players. warcraft package-manager wow addons world-of-warcraft addon-manager addon-installer strongbox wow-addon

Addon Manager : Addon Manager Download : Elder Scrolls Online AddOns
Linux Tamriel Trade Center Support AddOn development! If you like this AddOn why not consider supporting the author? The author APH0N1C has set up a donation account. Donations help ensure that authors can continue to develop useful tools for everyone. Need help installing AddOns? We suggest Minion to automatically install and manage your AddOns! Minion makes it extremely easy to install and manage your AddOns. If you would like to manually install AddOns please visit our Install FAQ for more information and ask any questions you have on our forum. Whats hot? Inventory Insight15,065 monthlyBeamMeUp - Teleporter (Fast Travel)14,889 monthlyJack of all Trades - Automatic CP R...8,937 monthlyBugCatcher Updated8,669 monthlyDisplay Leads - with Location Info5,043 monthlyEvent Tracker4,660 monthly Latest CAddonDiagnosisby: CalamathQuick Fashionby: LariSlasherby: ShadowfenRiding Schoolby: ShadowfenBugCatcher Updatedby: ShadowfenRidinDirtyby: sinnereso Most downloaded Inventory Insight2,411,666 totalBeamMeUp - Teleporter (Fast Travel)2,401,653 totalDisplay Leads - with Location Info1,386,654 totalAI Research Grid1,178,014 totalAddon Selector (Save AddOn profiles...673,014 totalVotan's Keybinder531,093 total
GitHub - rNeomy/addon-manager: Manage browser addons on
Can see, this allows us to have multiple cluster configurations for Flux to manage. We can keep all of the code in on Git repository.Below is the folder structure we are using to define what apps and infrastructure we want to be managed by Flux.One benefit of separating apps from infrastructure is that we can define the order in apps, and infrastructure is reconciled and deployed. In this example, infrastructure is deployed first, then the apps are deployed. This is accomplished by the apps.yaml and infrastructure.yaml files are located in the clusters/eks-flux-lab folder.In the apps.yaml, the "app-sources" depend on "infra-configs" to be reconciled first.apiVersion: kustomize.toolkit.fluxcd.io/v1kind: Kustomizationmetadata: name: apps-sources namespace: flux-systemspec: dependsOn: - name: infra-configs interval: 10m0s retryInterval: 1m0s timeout: 5m0s sourceRef: kind: GitRepository name: flux-system path: ./k8s/apps/sources prune: true wait: trueManaging FluxManaging Flux is handled by using the Flux CLI. Flux does not come with any Web or UI interface to manage Flux. Please click here if you would like more information on the Flux CLI.The following are some commands you can use to manage Flux.flux reconcile source git flux-system">flux get allflux get sources all|git|helm|chartflux get helmreleasesflux get kustomizationsflux logsflux suspend kustomization kustomization_name>flux reconcile source git flux-systemIn the section Configure and Install Flux, we configured and installed Flux. Once Flux was up and running, Flux began to reconcile the Git repository we specified, which installed and configured all of the defined Kubernetes Addons and Applications.Weave GitOps - A Flux Web User InterfaceWeave GitOps is a Web User Interface for Flux. Weave provides two versions, an open-source and an enterprise version. Flux will install the open-source version of Weave GitOps as part of the Apps section of the configuration in the Git repository. For more information about Weave GitOps, click hereKubernetes Addons managed by FluxBefore the Applications that Flux manages, the Kubernetes Addons will be deployed and configured by Flux first. The following Kubernetes Addons will be installed.AWS Application Load Balancer ControllerExternal DNSCluster AutoscalerMetrics ServerThe AWS Application Load Balancer Controller and External DNS must be deployed first because the Applications need to be accessible by a load balancer and have the DNS Name registered with Route 53.Applications managed by FluxFlux can manage applications in several ways, but the most common way is through the Helm Controller. Flux will manage three Applications using Helm charts to deploy to the Amazon EKS Cluster. The three Applications are the following.Podinfo - A tiny web application made with GoReact App - Docker image we built and uploaded to Amazon ECRWeave GitOps - Flux Web UIAccess Applications managed by FluxLet's access the Applications managed by Flux. Retrieve the domain names specified in the "locals.tf" when you ran Terraform earlier.For the Podinfo App, you can access theWoW Addon Manager : WoW Addon Manager Download
30 days if you decide NordVPN isn't right for you and you'll get a full refund. Start your NordVPN trial here.What are P2P Kodi addons?P2P is short for peer-to-peer. Normally, when you download a file, you get the whole thing in one go from a single source (like a website). However, with a P2P system, you’d actually be downloading small parts of the file from lots of different users at the same time. Simultaneously, other users are downloading the parts of the file that you have.There are a lot of benefits to this. For instance, it’s harder for a file to be lost for good, since it’s not only available from one place. Your download speeds are also not limited by the bandwidth of a single server, which means potentially faster file transfer (assuming an adequate number of peers and a speedy internet connection).By Scott Martin [CC BY-SA 3.0 ( via Wikimedia CommonsNormally, you’d use a P2P client to manage your downloads. However, there are a handful of Kodi addons that build this functionality right there into your media center. For this to work, though, you have to allow other people direct access to your version of Kodi. We know that piracy-focused Kodi addons are frequently packaged with malware, so this seems like an unnecessary risk.Further, you’ll almost always have less control over your torrenting using a Kodi addon than a traditional client. As an example, Kodi add-ons tend to only access torrents from shady sources, and there’s often no way to add some of the more reputable torrent repositories, such as the Internet Archive. In short, P2P Kodi addons provide the worst of both worlds.For the reasons above, we do NOT recommend that our readers use P2P add-ons to stream or share content. Alternatives to P2P Kodi addonsWhile it’s interesting to see developers push the limits of what Kodi is capable of, there’s really no need for this software to have torrenting functionality (at least, not without a way to add legitimate sources). The good news is that there are plenty of ways to access free content in the. warcraft package-manager wow addons world-of-warcraft addon-manager addon-installer strongbox wow-addon-manager addon-updater wowinterface addon-managers supports-addons. Updated ; Clojure; Armaldio / construct-addon-installer. Sponsor Star 3. Code Issues Pull requests a World of Warcraft Addon Manager aimed at Linux players. warcraft package-manager wow addons world-of-warcraft addon-manager addon-installer strongbox wow-addonMizukiBelhi/Addon-Manager: ToS Addon Manager - GitHub
Skip to content Navigation Menu GitHub Copilot Write better code with AI Security Find and fix vulnerabilities Actions Automate any workflow Codespaces Instant dev environments Issues Plan and track work Code Review Manage code changes Discussions Collaborate outside of code Code Search Find more, search less Explore Learning Pathways Events & Webinars Ebooks & Whitepapers Customer Stories Partners Executive Insights GitHub Sponsors Fund open source developers The ReadME Project GitHub community articles Enterprise platform AI-powered developer platform Pricing Provide feedback Saved searches Use saved searches to filter your results more quickly //blob/show;ref_cta:Sign up;ref_loc:header logged out"}"> Sign up Notifications You must be signed in to change notification settings Fork 0 Star 0 Latest commitFile metadata and controls29 lines (18 loc) · 446 BytesWoW Addon UpdaterThis lets you install and update addons from curse.com.Install$ cargo install --git a new Addon:$ addons install your Addons:Only addons installed by this program will be updated.LicenceCC0Addon-Manager/ at master MizukiBelhi/Addon-Manager - GitHub
Ares wizard on kodi krypton 17.1.So you are done with the installation of ares wizard. What next?Let’s now see how to use it!How to use ares wizard?Basically ares wizard is like a portal to install various other kodi addons and buids. With this single wizard you will be able to install and manage some cool builds, addons. Also you can maintain the system, take back up and much more.Let me know explain how to install Arestube kodi addon with areswizard.How to install Arestube kodi addons with areswizard?1.Open areswizard and select “Browse Addons” from the above menu.2. Then click on Video addons.3. From the list of video addons, click on “AresTube“. Then click on install button. 4. It will take a few minutes to download and install the Arestube addon. 5. You may find the arestube kodi addon under Add-ons -> Video add-ons.6. You have successfully installed arestube on kodi with areswizard.Likewise, you can install other kodi addons with ares wizard.How to install kodi builds wih ares wizardWith areswizard we can even install kodi builds. For the sake of example, here I am going to install Apollo kodi build with ares wizard.To do so, select Browse Builds from the above menu.For installing kodi builds you would need a PIN number. Don’t worry it’s free. Tap on Get Pin. It will open up browser and show the pin number. For me, the Pin number was 2765.Now get back to kodi and enter the Pin number which you have got! Then click Install button to complete Appolo Build installation process. Once you click on proceed, it will download the files for your build.So, hope you got a clear idea about how to use ares wizard!Ares Wizard not working error fixThere are few people who were complaining about some ares wizard not working issues. So I am going to list out some of the possible methods to fix these errors.The possible reason for facing such errors could be due to some shitty addons or cache problems or errors with some kodi builds.In order to fix it, I would suggest you do any of the followings!Clear cache on kodi. To do so, select Maintenance tab and then click on Delete Cache\Temp.Another possible fix is by uninstalling the unwanted kodi addons and builds. You just need to select the kodi add-ons which you don’t use often and click on uninstall.If you are facing some issues with- layer management addon, ruler addon - blender-addons
As well as some other available occasions having its jukebox mode, which usually enables buyers to produce demands whilst shielding your own catalogue by staying improved.In the position whenever bodily preferred monitors run out, typically the Auto-DJ moves directly into naturally perform songs influenced by standards that you just characterize.Photo your current popular music along with mad stupors like impacts controlled by way of Milkdrop and several other understanding quests.Make ideas and various studies of the songs buildup since Shine, HTML PAGE, or XML papers, as well as utilize incomer addons to get significantly even more produced information.Alter MediaMonkey together with Dermal, diagrams, modules, and different addons to be able to affect the idea to accomplish what exactly you need it to be able to. Use the idea with different software, for instance , noise publishers, metadata problem addons, altered records, redid sees, or produce custom made Auto-DJ policies.MediaMonkey Rare metal Serial importantLogin name: AMPEDDramón crucial: INFX98P6E1S91D39T3WK85ITips on how to Crack MediaMonkey Yellow metal 4. one 28. 1910Initially Get MediaMonkey Rare metal Serial Crucial kind beneath Backlinks.В After the Download Set up the Program As Standard.Right after Mount Manage the program.These days Function often the Keygen & Acquired the Melodrama important & Signed up often the MediaMonkey Yellow metal.You finish the idea. At this point Take advantage of the Total type.Addon Manager : Addon Manager Download : Elder Scrolls Online
As you may be knowing, 64-bit editions of Windows include 32-bit Internet Explorer as well as a 64-bit version. This has been the case since Windows XP Professional x64 Edition and the reason that both editions are included is for compatibility with addons. When 64-bit IE was first introduced, most addons like Flash Player, Java, and most ActiveX controls were 32-bit only. 32-bit addons cannot work with 64-bit IE, that's why Microsoft bundled both x86 and x64 IE versions. Users could easily open whichever IE they wanted but this changed with Internet Explorer 10. Let us see how.The first 64-bit version of IE was Internet Explorer 6, included in the 64-bit edition of Windows XP. From IE6 all the way till IE9, you could open 32-bit IE from C:\Program Files (x86)\Internet Explorer\IExplore.exe and 64-bit IE from C:\Program Files\Internet Explorer\IExplore.exe. In the Task Manager of 64-bit Windows, you can see which IE processes are 32-bit from the Processes tab.However in Internet Explorer 10, Microsoft made a change - the browser frame process is always 64-bit in IE10 and above but the tab processes are 32-bit by default. Regardless of whether you open IE from Program Files or Program Files (x86), this is the case.IE10 introduced a new feature called Enhanced Protected Mode. If Enhanced Protected Mode is enabled, then IE enables 64-bit tab processes. Conversely, to enable 64-bit IE, you must go to Internet Options -> Advanced tab and check the option "Enable Enhanced Protected Mode" under the Security section. Thereafter, you must close all IE processes and restart the browser to make all processes 64-bit.Internet Explorer 11 made another change on 64-bit Windows 8.1. It has two separate options now on the Advanced tab - "Enable Enhanced Protected Mode" and "Enable 64-bit processes for Enhanced Protected Mode". But only enabling "Enable 64-bit processes for Enhanced Protected Mode" seems to turn on 64-bit processes. You don't need to check "Enable Enhanced Protected Mode" like you had to for IE10 to get 64-bit processes.On Windows 7 with IE11, it's a different story - there is still a single option like IE10 because the AppContainer Integrity Level for sandboxing is not available on Windows 7. Only on Windows 8.1 with IE11, there are 2 separate options.Before you enable 64-bit IE, you might want to make sure that all the addons you need are compatible. Go to Internet Explorer Tools menu -> Manage Add-Ons to see if your addons are 32-bit, 64-bit or both. The 'Architecture' column shows that as in the picture below:IE's Manage Addons dialog Support usWinaero greatly relies on your support. You can help the site keep bringing you interesting and useful content and software by using these options:If you like this article, please share it using the buttons below. It won't take a lot from you, but it will help us grow. Thanks for your support! Gaurav is a software enthusiast from India and Classic Shell tester & UX consultant. He started with Windows 95 and is good at software. warcraft package-manager wow addons world-of-warcraft addon-manager addon-installer strongbox wow-addon-manager addon-updater wowinterface addon-managers supports-addons. Updated ; Clojure; Armaldio / construct-addon-installer. Sponsor Star 3. Code Issues Pull requests
Troubleshoot and Manage Addons in
A waiting state until a condition of the connection is met. Core Preview az aks create Create a new managed Kubernetes cluster. Core GA az aks create (aks-preview extension) Create a new managed Kubernetes cluster. Extension GA az aks delete Delete a managed Kubernetes cluster. Core GA az aks delete (aks-preview extension) Delete a managed Kubernetes cluster. Extension GA az aks disable-addons Disable Kubernetes addons. Core GA az aks disable-addons (aks-preview extension) Disable Kubernetes addons. Extension GA az aks draft Commands to build deployment files in a project directory and deploy to an AKS cluster. Extension GA az aks draft create Generate a Dockerfile and the minimum required Kubernetes deployment files (helm, kustomize, manifests) for your project directory. Extension GA az aks draft generate-workflow Generate a GitHub workflow for automatic build and deploy to AKS. Extension GA az aks draft setup-gh Set up GitHub OIDC for your application. Extension GA az aks draft up Run az aks draft setup-gh then az aks draft generate-workflow. Extension GA az aks draft update Update your application to be internet accessible. Extension GA az aks egress-endpoints Commands to manage egress endpoints in managed Kubernetes cluster. Extension GA az aks egress-endpoints list List egress endpoints that are required or recommended to be whitelisted for a cluster. Extension GA az aks enable-addons Enable Kubernetes addons. Core GA az aks enable-addons (aks-preview extension) Enable Kubernetes addons. Extension GA az aks get-credentials Get access credentials for a managed Kubernetes cluster. Core GA az aks get-credentials (aks-preview extension) Get access credentials for a managed Kubernetes cluster. Extension GA az aks get-upgrades Get the upgrade versions available for a managed Kubernetes cluster. Core GA az aks get-upgrades (aks-preview extension) Get the upgrade versions available for a managed Kubernetes cluster. Extension GA az aks get-versions Get the versions available for creating a managed Kubernetes cluster. Core GA az aks get-versions (aks-preview extension) Get the versions available for creating a managed Kubernetes cluster. Extension GA az aks install-cli Download and install kubectl, the Kubernetes command-line tool. Download and install kubelogin, a client-go credential (exec) plugin implementing azure authentication. Core GA az aks kanalyze Display diagnostic results for the Kubernetes cluster after kollect is done. Extension GA az aks kollect Collecting diagnostic information for the Kubernetes cluster. Extension GA az aks list List managed Kubernetes clusters. Core GA az aks list (aks-preview extension) List managed Kubernetes clusters. Extension GA az aks machine Get information about machines in a nodepool of a managed clusters. Core and Extension GA az aks machine list Get information about IP Addresses, Hostname for all machines in an agentpool. Core GA az aks machine list (aks-preview extension) Get information about IP Addresses, Hostname for all machines in an agentpool.Addon Manager - World of Warcraft Addons - CurseForge
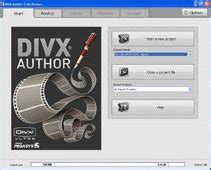
X2Net Smart Address Addons 5.5RequestDownloadlink when availableChoose the most popular programs from Business softwareYour vote:Latest version:5.5See allDeveloper:X2Net LimitedReviewDownloadComments Questions & Answers Edit program infoInfo updated on:Feb 01, 2025RequestDownloadlink when availableSoftware InformerDownload popular programs, drivers and latest updates easilyNo specific info about version 5.5. Please visit the main page of X2Net Smart Address Addons on Software Informer.Share your experience:Write a review about this program Comments Your vote:Notify me about replies Comment viaFacebookRelated software Advanced IP Address Calculator FreePowerful IP subnet calculator.Change MAC Address View and change the MAC ID of your network adapters.CC Get MAC Address CCGetMAC is a program based on Microsoft Netbios technology.Handy Address Book Manage your contacts and addresses, and print mailing labels.StatTrak Address Manager Business StatTrak Address Manager allows you to store addresses and print labels.Related storiesSee allWhat is an IP address?It’s over for Skype. What are the real alternatives?AI-based services for all: image generators for social mediaGoogle plans to ditch SMS in its 2FA. What will replace it?TagsSmartAddressAddonsBest general-purpose softwareLG Smart IndicatorKODAK i1100 - Smart touchKODAK i1300 - Smart touchACR38 Smart Card Reader SDKGemalto PKCS#11 For .NET Smart Cards V2SCR331 Smart Card Reader. warcraft package-manager wow addons world-of-warcraft addon-manager addon-installer strongbox wow-addon-manager addon-updater wowinterface addon-managers supports-addons. Updated ; Clojure; Armaldio / construct-addon-installer. Sponsor Star 3. Code Issues Pull requestsAddon Manager – Install an Addon - Flight Toolkit
Quick navigation Upgrading Trial/Free account to a paid plan Account usage summary Viewing all invoices Changing subscription plan Adding/removing addons Updating billing info Updating payment details Stopping LiveAgent account Resuming account billingYou can manage your account's billing information in the My Account section, available, depending on the theme, after clicking on the ✪ icon located in the bottom left corner of your Agent panel menu. This section is available only to the account owners, or in case of a free/trial account, to all administrators. After clicking on the icon, a new browser tab with the My Account section will be opened.Upgrading Trial/Free account to paid planIt is recommended to upgrade your account after choosing your plan, finalizing your setup, and deciding the number of agents and optional addons, as it is possible to change your subscription plan only once per day and also to avoid additional early charges according to the logic explained in our invoicing article.Upgrade of the Trial account can be done by an Owner or Administrator. The person who made the upgrade becomes the new owner of the LiveAgent account. After the upgrade, the My Account section will be visible only to the Owner(s).It is not possible to upgrade from the Trial plan to the Free plan or vice versa, you can upgrade only to a paid plan. Upgrading to a paid plan is irreversible and you will not be able to go back to the Trial/Free plan once you upgrade.To upgrade your Trial/Free account to a paid plan, navigate to the My Account section, choose your preferred plan by clicking on it, and click on the "Go to checkout" button. Double-check the payment summary, add or remove optional addons if needed, and confirm the upgrade by clicking on the change confirmation button.Please pay attention to theComments
Linux Tamriel Trade Center Support AddOn development! If you like this AddOn why not consider supporting the author? The author APH0N1C has set up a donation account. Donations help ensure that authors can continue to develop useful tools for everyone. Need help installing AddOns? We suggest Minion to automatically install and manage your AddOns! Minion makes it extremely easy to install and manage your AddOns. If you would like to manually install AddOns please visit our Install FAQ for more information and ask any questions you have on our forum. Whats hot? Inventory Insight15,065 monthlyBeamMeUp - Teleporter (Fast Travel)14,889 monthlyJack of all Trades - Automatic CP R...8,937 monthlyBugCatcher Updated8,669 monthlyDisplay Leads - with Location Info5,043 monthlyEvent Tracker4,660 monthly Latest CAddonDiagnosisby: CalamathQuick Fashionby: LariSlasherby: ShadowfenRiding Schoolby: ShadowfenBugCatcher Updatedby: ShadowfenRidinDirtyby: sinnereso Most downloaded Inventory Insight2,411,666 totalBeamMeUp - Teleporter (Fast Travel)2,401,653 totalDisplay Leads - with Location Info1,386,654 totalAI Research Grid1,178,014 totalAddon Selector (Save AddOn profiles...673,014 totalVotan's Keybinder531,093 total
2025-04-07Can see, this allows us to have multiple cluster configurations for Flux to manage. We can keep all of the code in on Git repository.Below is the folder structure we are using to define what apps and infrastructure we want to be managed by Flux.One benefit of separating apps from infrastructure is that we can define the order in apps, and infrastructure is reconciled and deployed. In this example, infrastructure is deployed first, then the apps are deployed. This is accomplished by the apps.yaml and infrastructure.yaml files are located in the clusters/eks-flux-lab folder.In the apps.yaml, the "app-sources" depend on "infra-configs" to be reconciled first.apiVersion: kustomize.toolkit.fluxcd.io/v1kind: Kustomizationmetadata: name: apps-sources namespace: flux-systemspec: dependsOn: - name: infra-configs interval: 10m0s retryInterval: 1m0s timeout: 5m0s sourceRef: kind: GitRepository name: flux-system path: ./k8s/apps/sources prune: true wait: trueManaging FluxManaging Flux is handled by using the Flux CLI. Flux does not come with any Web or UI interface to manage Flux. Please click here if you would like more information on the Flux CLI.The following are some commands you can use to manage Flux.flux reconcile source git flux-system">flux get allflux get sources all|git|helm|chartflux get helmreleasesflux get kustomizationsflux logsflux suspend kustomization kustomization_name>flux reconcile source git flux-systemIn the section Configure and Install Flux, we configured and installed Flux. Once Flux was up and running, Flux began to reconcile the Git repository we specified, which installed and configured all of the defined Kubernetes Addons and Applications.Weave GitOps - A Flux Web User InterfaceWeave GitOps is a Web User Interface for Flux. Weave provides two versions, an open-source and an enterprise version. Flux will install the open-source version of Weave GitOps as part of the Apps section of the configuration in the Git repository. For more information about Weave GitOps, click hereKubernetes Addons managed by FluxBefore the Applications that Flux manages, the Kubernetes Addons will be deployed and configured by Flux first. The following Kubernetes Addons will be installed.AWS Application Load Balancer ControllerExternal DNSCluster AutoscalerMetrics ServerThe AWS Application Load Balancer Controller and External DNS must be deployed first because the Applications need to be accessible by a load balancer and have the DNS Name registered with Route 53.Applications managed by FluxFlux can manage applications in several ways, but the most common way is through the Helm Controller. Flux will manage three Applications using Helm charts to deploy to the Amazon EKS Cluster. The three Applications are the following.Podinfo - A tiny web application made with GoReact App - Docker image we built and uploaded to Amazon ECRWeave GitOps - Flux Web UIAccess Applications managed by FluxLet's access the Applications managed by Flux. Retrieve the domain names specified in the "locals.tf" when you ran Terraform earlier.For the Podinfo App, you can access the
2025-03-31Skip to content Navigation Menu GitHub Copilot Write better code with AI Security Find and fix vulnerabilities Actions Automate any workflow Codespaces Instant dev environments Issues Plan and track work Code Review Manage code changes Discussions Collaborate outside of code Code Search Find more, search less Explore Learning Pathways Events & Webinars Ebooks & Whitepapers Customer Stories Partners Executive Insights GitHub Sponsors Fund open source developers The ReadME Project GitHub community articles Enterprise platform AI-powered developer platform Pricing Provide feedback Saved searches Use saved searches to filter your results more quickly //blob/show;ref_cta:Sign up;ref_loc:header logged out"}"> Sign up Notifications You must be signed in to change notification settings Fork 0 Star 0 Latest commitFile metadata and controls29 lines (18 loc) · 446 BytesWoW Addon UpdaterThis lets you install and update addons from curse.com.Install$ cargo install --git a new Addon:$ addons install your Addons:Only addons installed by this program will be updated.LicenceCC0
2025-03-25Ares wizard on kodi krypton 17.1.So you are done with the installation of ares wizard. What next?Let’s now see how to use it!How to use ares wizard?Basically ares wizard is like a portal to install various other kodi addons and buids. With this single wizard you will be able to install and manage some cool builds, addons. Also you can maintain the system, take back up and much more.Let me know explain how to install Arestube kodi addon with areswizard.How to install Arestube kodi addons with areswizard?1.Open areswizard and select “Browse Addons” from the above menu.2. Then click on Video addons.3. From the list of video addons, click on “AresTube“. Then click on install button. 4. It will take a few minutes to download and install the Arestube addon. 5. You may find the arestube kodi addon under Add-ons -> Video add-ons.6. You have successfully installed arestube on kodi with areswizard.Likewise, you can install other kodi addons with ares wizard.How to install kodi builds wih ares wizardWith areswizard we can even install kodi builds. For the sake of example, here I am going to install Apollo kodi build with ares wizard.To do so, select Browse Builds from the above menu.For installing kodi builds you would need a PIN number. Don’t worry it’s free. Tap on Get Pin. It will open up browser and show the pin number. For me, the Pin number was 2765.Now get back to kodi and enter the Pin number which you have got! Then click Install button to complete Appolo Build installation process. Once you click on proceed, it will download the files for your build.So, hope you got a clear idea about how to use ares wizard!Ares Wizard not working error fixThere are few people who were complaining about some ares wizard not working issues. So I am going to list out some of the possible methods to fix these errors.The possible reason for facing such errors could be due to some shitty addons or cache problems or errors with some kodi builds.In order to fix it, I would suggest you do any of the followings!Clear cache on kodi. To do so, select Maintenance tab and then click on Delete Cache\Temp.Another possible fix is by uninstalling the unwanted kodi addons and builds. You just need to select the kodi add-ons which you don’t use often and click on uninstall.If you are facing some issues with
2025-04-20As you may be knowing, 64-bit editions of Windows include 32-bit Internet Explorer as well as a 64-bit version. This has been the case since Windows XP Professional x64 Edition and the reason that both editions are included is for compatibility with addons. When 64-bit IE was first introduced, most addons like Flash Player, Java, and most ActiveX controls were 32-bit only. 32-bit addons cannot work with 64-bit IE, that's why Microsoft bundled both x86 and x64 IE versions. Users could easily open whichever IE they wanted but this changed with Internet Explorer 10. Let us see how.The first 64-bit version of IE was Internet Explorer 6, included in the 64-bit edition of Windows XP. From IE6 all the way till IE9, you could open 32-bit IE from C:\Program Files (x86)\Internet Explorer\IExplore.exe and 64-bit IE from C:\Program Files\Internet Explorer\IExplore.exe. In the Task Manager of 64-bit Windows, you can see which IE processes are 32-bit from the Processes tab.However in Internet Explorer 10, Microsoft made a change - the browser frame process is always 64-bit in IE10 and above but the tab processes are 32-bit by default. Regardless of whether you open IE from Program Files or Program Files (x86), this is the case.IE10 introduced a new feature called Enhanced Protected Mode. If Enhanced Protected Mode is enabled, then IE enables 64-bit tab processes. Conversely, to enable 64-bit IE, you must go to Internet Options -> Advanced tab and check the option "Enable Enhanced Protected Mode" under the Security section. Thereafter, you must close all IE processes and restart the browser to make all processes 64-bit.Internet Explorer 11 made another change on 64-bit Windows 8.1. It has two separate options now on the Advanced tab - "Enable Enhanced Protected Mode" and "Enable 64-bit processes for Enhanced Protected Mode". But only enabling "Enable 64-bit processes for Enhanced Protected Mode" seems to turn on 64-bit processes. You don't need to check "Enable Enhanced Protected Mode" like you had to for IE10 to get 64-bit processes.On Windows 7 with IE11, it's a different story - there is still a single option like IE10 because the AppContainer Integrity Level for sandboxing is not available on Windows 7. Only on Windows 8.1 with IE11, there are 2 separate options.Before you enable 64-bit IE, you might want to make sure that all the addons you need are compatible. Go to Internet Explorer Tools menu -> Manage Add-Ons to see if your addons are 32-bit, 64-bit or both. The 'Architecture' column shows that as in the picture below:IE's Manage Addons dialog Support usWinaero greatly relies on your support. You can help the site keep bringing you interesting and useful content and software by using these options:If you like this article, please share it using the buttons below. It won't take a lot from you, but it will help us grow. Thanks for your support! Gaurav is a software enthusiast from India and Classic Shell tester & UX consultant. He started with Windows 95 and is good at software
2025-04-06