Find shortcut windows
Author: p | 2025-04-24
3] Broken Shortcut Fixer. Broken Shortcut Fix finds broken shortcuts on your Windows computer and automatically repairs any shortcuts it can find using the Windows link resolution method. To use this broken keyboard shortcut: Click Scan Shortcuts to repair and find broken shortcuts. Double-click broken shortcuts to display them in Windows. Move
Find - vscode shortcut for Windows - Shortcut Masters
+ A Shift + F10 Control + A Current folder actions menu Alt + Shift + A Control + Shift + A Sort menu Alt + R Control + R Settings menu Control + Shift + S Command + Shift + S Shortcut description Windows/ChromeOS shortcut MacOS shortcut Application actions Display keyboard shortcuts list Ctrl + / Command + / Choose next visual density (row height and element spacing for list view) Alt + T, then Q Control + T, then Q Find/find next Ctrl + F Command + F Print Ctrl + P Command + P Undo last action Ctrl + Z Command + Z Redo last undone action Ctrl + Y Command + Y Show last message Alt + G, then k Option + G, then k Search your Drive / / Shortcut description Windows/ChromeOS shortcut MacOS shortcut Preview mode actions Preview items Ctrl + Alt + P Command + Option + P Close Esc Esc Play/pause Space Space Zoom in + or = + or = Zoom out - -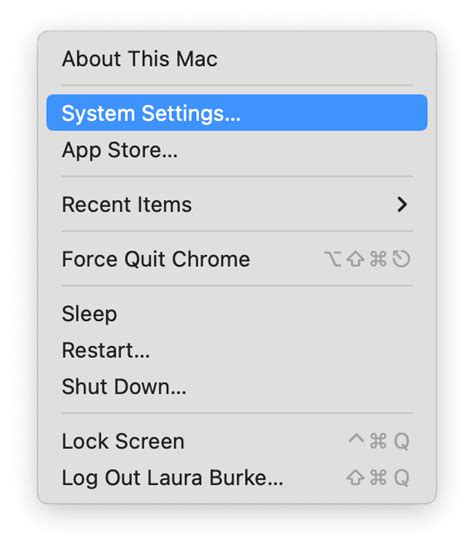
Find Keyboard Shortcut for Windows
Don’t want Windows to automatically put an arrow on shortcut icons? There’s a very simple way to remove it, and you don’t even need to install anything.We previously looked at editing the shortcut arrows with a registry tweak. This may not be the approach you want to take if you’re hesitant to dive into the registry, which is completely understandable. This is why Windows Shortcut Arrow Editor has been created. The program doesn’t require an install and works from Vista to Windows 8.Read on to find out how this program works.Remote Shortcut Arrows in WindowsBegin by downloading the program here and extracting it with something like WinRAR or 7-Zip. The following folders will be the output:The “Shortcut arrows” folder contains six icon files you The other two folders both contain an “x64” and “x86” folder with the program for each contained within. Open “cmd” from the start menu and enter “wmic os get osarchitecture” to find which folder you should open for your Windows OS.I, evidently, have a 64-bit system, so I’m going to open the “Windows 8 > x64” folder. Launch “WindowsShortcutArrowEditor” from this folder to begin.The rest is quite straightforward. Choose any of the options for a different effect. Remove all shortcut arrows with the third option, called “No Arrow.”This is what the “Windows Default” icon set looks like in Windows 8:A sleeker looking desktop is seen when you completely remove the arrows, as you can see here:Final ThoughtsI have to say, this method is easier than the registry tweak we looked at before. It only takes seconds and does the job perfectly, without the fear of getting lost in the registry.Download Windows Shortcut Arrow EditorFind Next Keyboard Shortcut for Windows
The App URI commands. Almost every settings page has its own URI. You can think of the URI as a specific command to open a specific settings page. Once we have the URI, you can create the desktop shortcut normally. You will find the command list for various settings below. Find the one you want to use and follow the steps given below.Right-click on the desktop.Select the “New -> Shortcut” option.Type the settings page command (see below).Click “Next.”Type a name of your choice.Click the “Finish” button.With that, you have created a desktop shortcut for settings.First, go to the desktop. You can do that by minimizing all the applications or pressing the “Windows key + I” shortcut. On the desktop, right-click and select the “New -> Shortcut” option.In the shortcut window, type the command of the settings page you wish to open and click the “Next” button. You will find all the available commands below. For example, I want to open the “Bluetooth and devices” page in the Settings app. So, I typed “ms-settings:bluetooth.”Now, type a name for the shortcut and click the “Finish” button. You can name the shortcut anything you want. I recommend you name it something that is easily recognizable so that you don’t get confused.That is it. With that, you have created a desktop shortcut for a specific setting in Windows 10. Just double-click on the shortcut and the relevant settings page will be opened immediately.Setting page commands to use in shortcutsThese are the commands you should use when creating desktop shortcut for specific settings pages.Themes: ms-settings:themesMotion: ms-settings:privacy-motionBattery Saver: ms-settings:batterysaver-settingsStart: ms-settings:personalization-startDial-up: ms-settings:network-dialupTablet mode: ms-settings://tabletmode/Speech: ms-settings:speechAirplane mode: ms-settings:network-airplanemodeContacts: ms-settings:privacy-contactsDate and Time: ms-settings:dateandtimeClosed Captioning: ms-settings:easeofaccess-closedcaptioningSpeech, inking, & typing: ms-settings:privacy-speechtypingBackgrounds: ms-settings:personalization-backgroundPersonalization: ms-settings:personalizationStorage Sense: ms-settings:storagesenseProxy: ms-settings:network-proxyMessaging: ms-settings:privacy-messagingVPN: ms-settings:network-vpnOther options & Ease of Access: ms-settings:easeofaccess-otheroptionsDirectAccess: ms-settings:network-directaccessMouse: ms-settings:easeofaccess-mouseEthernet: ms-settings:network-ethernetRegion & language: ms-settings:regionlanguageOffline maps:. 3] Broken Shortcut Fixer. Broken Shortcut Fix finds broken shortcuts on your Windows computer and automatically repairs any shortcuts it can find using the Windows link resolution method. To use this broken keyboard shortcut: Click Scan Shortcuts to repair and find broken shortcuts. Double-click broken shortcuts to display them in Windows. MoveWord Shortcuts for Find and Replace, Go To and Find (6 Shortcuts)
Changing the snipping tool shortcut in Windows 11 is a straightforward process that involves a few simple steps. By following these steps, you can set a custom keyboard shortcut to open the Snipping Tool, making it easier to capture screenshots quickly. In the steps below, you’ll learn how to assign a new keyboard shortcut for the Snipping Tool in Windows 11. This will let you open the tool faster using the keys you choose.Step 1: Open SettingsFirst, you need to open the Settings app on your Windows 11 computer.To do this, you can press the Windows key + I on your keyboard, or click the Start button and select Settings from the menu.Step 2: Go to AccessibilityNext, navigate to the Accessibility section in Settings.Once inside the Settings app, find the Accessibility tab on the left sidebar and click on it.Step 3: Select KeyboardNow, click on the Keyboard option under the Interaction section.In the Accessibility window, scroll down to the Interaction section and select Keyboard. This is where you will find options to create and modify keyboard shortcuts.Step 4: Turn on Keyboard Shortcut for Snipping ToolEnable the option to set a keyboard shortcut for the Snipping Tool.Find the Use the Print Screen button to open screen snipping option and turn it on. This will allow you to use the Print Screen (PrtScn) button to open the Snipping Tool.Step 5: Set a Custom ShortcutYou can now set a custom shortcut if you prefer something other than the Print Screen button.Click into the Shortcut field and press the key combination you want to use, such as Ctrl + Shift + S. This will set your new shortcut.Step 6: Save ChangesFinally, make sure to save your changes.After setting your custom shortcut, click Apply or Save if prompted. Your new shortcut will now be active.Once you’ve completed these steps, your new shortcut will be ready to use. Pressing the designated keys will open the Snipping Tool, allowing you to take screenshots quickly and efficiently.Tips for Changing Snipping Tool Shortcut Windows 11Choose a memorable shortcut: Make sure the new shortcut is easy to remember and doesn’t conflict with shortcuts for other frequently used programs.Test your new shortcut: After setting it, practice using the shortcut a few times to ensure it works as expected.Avoid complex combinations: Try to use a combination that involves fewer keys to reduce the chance of errors when you’re in a hurry.Back upFind delete broken shortcuts on Windows - tothepc.com
Developed By: quickshortcutLicense: FreeRating: 3,7/5 - 252 votesLast Updated: February 23, 2025App DetailsVersion2.1.013Size6.3 MBRelease DateMarch 15, 24CategoryTools AppsApp Permissions:Allows applications to access information about networks. [see more (9)]Description from Developer:This app can create a shortcut on android homescreen for anything you want from your android.🟡 This quick shortcut maker could help us quick launch some common features by create... [read more]About this appOn this page you can download Quick Shortcut Maker and install on Windows PC. Quick Shortcut Maker is free Tools app, developed by quickshortcut. Latest version of Quick Shortcut Maker is 2.1.013, was released on 2024-03-15 (updated on 2025-02-23). Estimated number of the downloads is more than 100,000. Overall rating of Quick Shortcut Maker is 3,7. Generally most of the top apps on Android Store have rating of 4+. This app had been rated by 252 users, 56 users had rated it 5*, 112 users had rated it 1*. How to install Quick Shortcut Maker on Windows?Instruction on how to install Quick Shortcut Maker on Windows 10 Windows 11 PC & LaptopIn this post, I am going to show you how to install Quick Shortcut Maker on Windows PC by using Android App Player such as BlueStacks, LDPlayer, Nox, KOPlayer, ...Before you start, you will need to download the APK/XAPK installer file, you can find download button on top of this page. Save it to easy-to-find location.[Note] You can also download older versions of this app on bottom of this page.Below you will find a detailed step-by-step guide, but I want to give you a fast overview of how it works. All you need is an emulator that will emulate an Android device on your Windows PC and then you can install applications and use it - you see you're playing it on Android, but this runs not on a smartphone or tablet, it runs on a PC.If this doesn't work on your PC, or you cannot install, comment here and we will help you!Install using BlueStacksInstall using NoxPlayerStep By Step Guide To Install Quick Shortcut Maker using BlueStacksDownload and Install BlueStacks at: The installation procedure is quite simple. After successful installation, open the Bluestacks emulator. It may take some time to load the Bluestacks app initially. Once it is opened, you should be able to see the Home screen of Bluestacks.Open the APK/XAPK file: Double-click the APK/XAPK file to launch BlueStacks and install the application. If your APK/XAPK file doesn't automatically open BlueStacks, right-click on it and select Open with... Browse to the BlueStacks. You can also drag-and-drop the APK/XAPK file onto the BlueStacks home screenOnce installed, click "Quick Shortcut Maker" icon on the home screen to start using, it'll work like a charm :D[Note 1] ForHow to find the original file for a shortcut on Windows
Generally, we use File Explorer to navigate and open folders, but some folders are accessed so frequently that having a quicker way would be really convenient. To make it happen, you can assign a keyboard shortcut to open a folder directly. This saves you the hassle of manually opening File Explorer and navigating to your favorite or frequently-used folder. For example, I often need to open my screenshots folder multiple times a day. To make this easier, I not only pinned the folder to the taskbar but also assigned a keyboard shortcut, allowing me to open it instantly.In this quick and easy tutorial, I’ll show you step-by-step how to open a folder using a keyboard shortcut in both Windows 11 and Windows 10. Let’s get started.Right-click on the desktop.Select the “New” > “Shortcut” option.Click the “Browse” button.Select the folder and click “OK“.Click “Next” in the shortcut wizard.Enter a name in the “Name” field.Click “Finish“.Right-click the shortcut and select “Properties“.Select the “Shortcut key” field under the “Shortcut” tab.Press the shortcut you want to assign (the shortcut should start “Ctrl + Alt”).Click “Apply” and “OK“.From now on, press the keyboard shortcut to open the folder.Detailed Steps (With Screenshots)First, go to your desktop by pressing the “Windows key + D” shortcut. Next, right-click on the desktop and select “New” and then the “Shortcut” option. Click “Browse” in the Shortcut wizard. Next, find and select the folder for which you want to assign a shortcut and click the “OK” button.Click the “Next” button in the main window.Enter a name of your choice in the “Type a name for this shortcut” field and click the “Finish” button. This action creates the desktop shortcut with the selected name.Once created, right-click the shortcut, and select the “Properties” option.Go to the “Shortcut” tab and select the “Shortcut key”Find the source file for a Windows shortcut? - Ask
A valid shortcut provides quicker access to files while a broken one turns out useless and even get infected with virus. Incomplete program uninstall, registry errors and updates to the Windows operating system can all cause broken shortcuts. They are to mess desktop, take up space and slow down your machine... PCTuneUp Free Shortcut Fixer, a professional shortcut fixer tool, is here for you. With ability to fix all broken shortcuts, the shortcut remover will troubleshoot all your headache problems.Broken shortcuts can cause all sorts of frustrating problems in Windows such as system freezes, lock-ups, sudden shutdown and startup, slow PC running speed and more. PCTuneUp Free Shortcut Fixer is at your service to assists scanning the designated directory, find and remove all remnants of broken shortcuts to surely boost your PC performance.Anyone who has access to your computer can view your Internet history. Simply deleting and clearing your recent searches removes only a fraction of your private info. This free shortcut remover is able to find all your recent history shortcuts including those linked to the deleted or uninstalled programs and thoroughly delete them to provide total privacy protection.Having an exact shortcut in mind and want to find it in the sea of shortcuts icons in no time? The advanced filter function of this free shortcut fixer will satisfy you. What you need to do is input part of or full name of a shortcut. The more specific name you enter, the fewer shortcuts are displayed. Easy to focus on the shortcut that you actually need. Meanwhile, It manages to list any specific group of shortcuts like valid shortcuts, invalid ones or all shortcuts for your batch disposal.By few clicks, the efficient shortcut finder will clearly list all the invalid or valid shortcuts on desktop for your disposal to delete any single one or all of them. No longer have to search for and delete them one by one among piles of icons.. 3] Broken Shortcut Fixer. Broken Shortcut Fix finds broken shortcuts on your Windows computer and automatically repairs any shortcuts it can find using the Windows link resolution method. To use this broken keyboard shortcut: Click Scan Shortcuts to repair and find broken shortcuts. Double-click broken shortcuts to display them in Windows. Move 3] Broken Shortcut Fixer. Broken Shortcut Fix finds broken shortcuts on your Windows computer and automatically repairs any shortcuts it can find using the Windows link resolution method. To use this broken keyboard shortcut: Click Scan Shortcuts to repair and find broken shortcuts. Double-click broken shortcuts to display them in Windows. Move
Word Shortcuts for Find and Replace, Go To and Find
Download Windows Speedup Tool to fix errors and make PC run fasterThe Windows operating system allows you to pin most software or apps directly to the taskbar for quick access when you’re on the desktop. This, however, does not hold true for Windows Update. While it is simple to pin it to the Windows Start Screen or Windows Start Menu, it is not straightforward to pin it to the Taskbar. Today, we will see how to pin Windows Update icon to Taskbar or Start Menu in Windows 11/10.Open Settings > Update and SecurityRight-click on Windows Update and select Pin to Start.Windows 11 does not offer this context menu item. You have to follow another way.Pin Windows Update to Taskbar in Windows 11/10Create a desktop shortcut and use the following path in the Target field:ms-settings:windowsupdateThen drag the desktop shortcut to the taskbar.In Windows 11, you can right-click on this shortcut and select Pint to Start.Pin Windows Update to Windows 8 Start Screen or Windows 7 Start MenuThis is simple. Open Control Panel and right-click on Windows Update and select Pin to Start. You will see the shortcut pinned to your Start.Pin Windows Update to the Windows 8/7 TaskbarTo do this, open Control Panel and then drag-and-drop Windows Update to your desktop. Alternatively, you could also select Create shortcut instead – and its shortcut will be created on your desktop.Now right-click on the icon and choose ‘Properties’. Then, under the ‘Shortcut tab’ enter the following address for the Target field:cmd /c wuapp.exeIf this does not work for you, and you are unable to change the Target field, then do the following instead. Delete the just-created desktop shortcut. Now, right-click on Desktop > New > Shortcut.In the location path, type the following, name it Windows Update and click Next:cmd /c wuapp.exeA desktop shortcut will be created. Now right-click on the icon and choose ‘Properties’.Under the Shortcut tab, change the ‘Run’ menu to ‘Minimized‘. Click OK.Next, click on Change icon and enter the icon path as:%SystemRoot%\system32\wucltux.dllClick Apply/OK. The icon will change.Finally, right-click on the Windows Update icon on your Desktop screen. You should findHow To Use The Excel Find Shortcut To Find
Search resultsWeb results: To exit Incognito mode, close all Incognito windows. If you find a number, at the top right, next to the Incognito icon, you have multiple Incognito windows open. To close an Incognito window: On your computer, open the Incognito window. Close the window: Windows or Chromebook: At the top right, select Close . Mac: At the top left, select Close . Create Google Chrome Incognito Mode Shortcut that Always Opens in New Incognito Window 1 Right click or press and hold on your desktop, click/tap on New , and click/tap on Shortcut . 2 Type the location you want to use below depending on if you have a 32-bit or 64-bit Windows installed, and click/tap on Next . To exit Incognito mode, close all Incognito windows. If you find a number, at the top right, next to the Incognito icon, you have multiple Incognito windows open. To close an Incognito window: On your computer, open the Incognito window. Close the window: Windows or Chromebook: At the top right, select Close . Mac: At the top left, select Close . This tutorial will show you how to create a shortcut that directly opens an InPrivate browsing window in the Chromium based Microsoft Edge. EXAMPLE: Microsoft Edge InPrivate browsing window Here's How: 1 Right click or press and hold on the desktop (Win+D), click/tap on New, and click/tap on Shortcut. If you have an Incognito window open and you open another one, your private browsing session will continue in. 3] Broken Shortcut Fixer. Broken Shortcut Fix finds broken shortcuts on your Windows computer and automatically repairs any shortcuts it can find using the Windows link resolution method. To use this broken keyboard shortcut: Click Scan Shortcuts to repair and find broken shortcuts. Double-click broken shortcuts to display them in Windows. MoveFind - vscode shortcut for Windows - Shortcut Masters
Creating shortcuts on your desktop in Windows 11 is easier than you think. All you need to do is locate the program or file you want to create a shortcut for, right-click it, select ‘Create shortcut’, and drag it onto your desktop. And voilà, you have a new shortcut on your desktop!Step by Step Tutorial: Creating Shortcut on Desktop Windows 11Creating a shortcut on your desktop in Windows 11 can make accessing your most used programs, files, or folders a breeze. Let’s walk through the steps to get this done.Step 1: Navigate to the item you want to create a shortcut forThis could be a program, file, or folder.Once you have located the item, right-click on it. A context menu will appear with several options. Look for the option that says ‘Create shortcut’. If you’re creating a shortcut for a program, you might need to find the program in the Start Menu first.Step 2: Create the shortcutClick on ‘Create shortcut’.A new shortcut will appear in the same location as the original item, usually with the name "Shortcut to…" or " – Shortcut" at the end.Step 3: Move the shortcut to the desktopClick and drag the new shortcut onto your desktop.Release the mouse button, and the shortcut will drop onto your desktop. You can place it wherever you want on the desktop by dragging it around.After completing these steps, you’ll have a new shortcut on your desktop. This shortcut will act as a quick link to the item, allowing you to open it without having to navigate through folders or menus.Tips for Creating Shortcuts on Desktop Windows 11Make sure to rename your shortcuts to something meaningful so you can easily identify them.Organize your desktop shortcuts into groups for better accessibility.Use custom icons for your shortcuts to make them visually distinct.Create keyboard shortcuts for your desktop shortcuts for even faster access.Regularly clean up your desktop to remove shortcuts you no longer use.Frequently Asked QuestionsCan I create shortcuts for websites on my desktop?Yes, you can create website shortcuts on your desktop by dragging the URL from the address bar of your web browserComments
+ A Shift + F10 Control + A Current folder actions menu Alt + Shift + A Control + Shift + A Sort menu Alt + R Control + R Settings menu Control + Shift + S Command + Shift + S Shortcut description Windows/ChromeOS shortcut MacOS shortcut Application actions Display keyboard shortcuts list Ctrl + / Command + / Choose next visual density (row height and element spacing for list view) Alt + T, then Q Control + T, then Q Find/find next Ctrl + F Command + F Print Ctrl + P Command + P Undo last action Ctrl + Z Command + Z Redo last undone action Ctrl + Y Command + Y Show last message Alt + G, then k Option + G, then k Search your Drive / / Shortcut description Windows/ChromeOS shortcut MacOS shortcut Preview mode actions Preview items Ctrl + Alt + P Command + Option + P Close Esc Esc Play/pause Space Space Zoom in + or = + or = Zoom out - -
2025-04-23Don’t want Windows to automatically put an arrow on shortcut icons? There’s a very simple way to remove it, and you don’t even need to install anything.We previously looked at editing the shortcut arrows with a registry tweak. This may not be the approach you want to take if you’re hesitant to dive into the registry, which is completely understandable. This is why Windows Shortcut Arrow Editor has been created. The program doesn’t require an install and works from Vista to Windows 8.Read on to find out how this program works.Remote Shortcut Arrows in WindowsBegin by downloading the program here and extracting it with something like WinRAR or 7-Zip. The following folders will be the output:The “Shortcut arrows” folder contains six icon files you The other two folders both contain an “x64” and “x86” folder with the program for each contained within. Open “cmd” from the start menu and enter “wmic os get osarchitecture” to find which folder you should open for your Windows OS.I, evidently, have a 64-bit system, so I’m going to open the “Windows 8 > x64” folder. Launch “WindowsShortcutArrowEditor” from this folder to begin.The rest is quite straightforward. Choose any of the options for a different effect. Remove all shortcut arrows with the third option, called “No Arrow.”This is what the “Windows Default” icon set looks like in Windows 8:A sleeker looking desktop is seen when you completely remove the arrows, as you can see here:Final ThoughtsI have to say, this method is easier than the registry tweak we looked at before. It only takes seconds and does the job perfectly, without the fear of getting lost in the registry.Download Windows Shortcut Arrow Editor
2025-04-18Changing the snipping tool shortcut in Windows 11 is a straightforward process that involves a few simple steps. By following these steps, you can set a custom keyboard shortcut to open the Snipping Tool, making it easier to capture screenshots quickly. In the steps below, you’ll learn how to assign a new keyboard shortcut for the Snipping Tool in Windows 11. This will let you open the tool faster using the keys you choose.Step 1: Open SettingsFirst, you need to open the Settings app on your Windows 11 computer.To do this, you can press the Windows key + I on your keyboard, or click the Start button and select Settings from the menu.Step 2: Go to AccessibilityNext, navigate to the Accessibility section in Settings.Once inside the Settings app, find the Accessibility tab on the left sidebar and click on it.Step 3: Select KeyboardNow, click on the Keyboard option under the Interaction section.In the Accessibility window, scroll down to the Interaction section and select Keyboard. This is where you will find options to create and modify keyboard shortcuts.Step 4: Turn on Keyboard Shortcut for Snipping ToolEnable the option to set a keyboard shortcut for the Snipping Tool.Find the Use the Print Screen button to open screen snipping option and turn it on. This will allow you to use the Print Screen (PrtScn) button to open the Snipping Tool.Step 5: Set a Custom ShortcutYou can now set a custom shortcut if you prefer something other than the Print Screen button.Click into the Shortcut field and press the key combination you want to use, such as Ctrl + Shift + S. This will set your new shortcut.Step 6: Save ChangesFinally, make sure to save your changes.After setting your custom shortcut, click Apply or Save if prompted. Your new shortcut will now be active.Once you’ve completed these steps, your new shortcut will be ready to use. Pressing the designated keys will open the Snipping Tool, allowing you to take screenshots quickly and efficiently.Tips for Changing Snipping Tool Shortcut Windows 11Choose a memorable shortcut: Make sure the new shortcut is easy to remember and doesn’t conflict with shortcuts for other frequently used programs.Test your new shortcut: After setting it, practice using the shortcut a few times to ensure it works as expected.Avoid complex combinations: Try to use a combination that involves fewer keys to reduce the chance of errors when you’re in a hurry.Back up
2025-03-27Developed By: quickshortcutLicense: FreeRating: 3,7/5 - 252 votesLast Updated: February 23, 2025App DetailsVersion2.1.013Size6.3 MBRelease DateMarch 15, 24CategoryTools AppsApp Permissions:Allows applications to access information about networks. [see more (9)]Description from Developer:This app can create a shortcut on android homescreen for anything you want from your android.🟡 This quick shortcut maker could help us quick launch some common features by create... [read more]About this appOn this page you can download Quick Shortcut Maker and install on Windows PC. Quick Shortcut Maker is free Tools app, developed by quickshortcut. Latest version of Quick Shortcut Maker is 2.1.013, was released on 2024-03-15 (updated on 2025-02-23). Estimated number of the downloads is more than 100,000. Overall rating of Quick Shortcut Maker is 3,7. Generally most of the top apps on Android Store have rating of 4+. This app had been rated by 252 users, 56 users had rated it 5*, 112 users had rated it 1*. How to install Quick Shortcut Maker on Windows?Instruction on how to install Quick Shortcut Maker on Windows 10 Windows 11 PC & LaptopIn this post, I am going to show you how to install Quick Shortcut Maker on Windows PC by using Android App Player such as BlueStacks, LDPlayer, Nox, KOPlayer, ...Before you start, you will need to download the APK/XAPK installer file, you can find download button on top of this page. Save it to easy-to-find location.[Note] You can also download older versions of this app on bottom of this page.Below you will find a detailed step-by-step guide, but I want to give you a fast overview of how it works. All you need is an emulator that will emulate an Android device on your Windows PC and then you can install applications and use it - you see you're playing it on Android, but this runs not on a smartphone or tablet, it runs on a PC.If this doesn't work on your PC, or you cannot install, comment here and we will help you!Install using BlueStacksInstall using NoxPlayerStep By Step Guide To Install Quick Shortcut Maker using BlueStacksDownload and Install BlueStacks at: The installation procedure is quite simple. After successful installation, open the Bluestacks emulator. It may take some time to load the Bluestacks app initially. Once it is opened, you should be able to see the Home screen of Bluestacks.Open the APK/XAPK file: Double-click the APK/XAPK file to launch BlueStacks and install the application. If your APK/XAPK file doesn't automatically open BlueStacks, right-click on it and select Open with... Browse to the BlueStacks. You can also drag-and-drop the APK/XAPK file onto the BlueStacks home screenOnce installed, click "Quick Shortcut Maker" icon on the home screen to start using, it'll work like a charm :D[Note 1] For
2025-04-17A valid shortcut provides quicker access to files while a broken one turns out useless and even get infected with virus. Incomplete program uninstall, registry errors and updates to the Windows operating system can all cause broken shortcuts. They are to mess desktop, take up space and slow down your machine... PCTuneUp Free Shortcut Fixer, a professional shortcut fixer tool, is here for you. With ability to fix all broken shortcuts, the shortcut remover will troubleshoot all your headache problems.Broken shortcuts can cause all sorts of frustrating problems in Windows such as system freezes, lock-ups, sudden shutdown and startup, slow PC running speed and more. PCTuneUp Free Shortcut Fixer is at your service to assists scanning the designated directory, find and remove all remnants of broken shortcuts to surely boost your PC performance.Anyone who has access to your computer can view your Internet history. Simply deleting and clearing your recent searches removes only a fraction of your private info. This free shortcut remover is able to find all your recent history shortcuts including those linked to the deleted or uninstalled programs and thoroughly delete them to provide total privacy protection.Having an exact shortcut in mind and want to find it in the sea of shortcuts icons in no time? The advanced filter function of this free shortcut fixer will satisfy you. What you need to do is input part of or full name of a shortcut. The more specific name you enter, the fewer shortcuts are displayed. Easy to focus on the shortcut that you actually need. Meanwhile, It manages to list any specific group of shortcuts like valid shortcuts, invalid ones or all shortcuts for your batch disposal.By few clicks, the efficient shortcut finder will clearly list all the invalid or valid shortcuts on desktop for your disposal to delete any single one or all of them. No longer have to search for and delete them one by one among piles of icons.
2025-04-04Download Windows Speedup Tool to fix errors and make PC run fasterThe Windows operating system allows you to pin most software or apps directly to the taskbar for quick access when you’re on the desktop. This, however, does not hold true for Windows Update. While it is simple to pin it to the Windows Start Screen or Windows Start Menu, it is not straightforward to pin it to the Taskbar. Today, we will see how to pin Windows Update icon to Taskbar or Start Menu in Windows 11/10.Open Settings > Update and SecurityRight-click on Windows Update and select Pin to Start.Windows 11 does not offer this context menu item. You have to follow another way.Pin Windows Update to Taskbar in Windows 11/10Create a desktop shortcut and use the following path in the Target field:ms-settings:windowsupdateThen drag the desktop shortcut to the taskbar.In Windows 11, you can right-click on this shortcut and select Pint to Start.Pin Windows Update to Windows 8 Start Screen or Windows 7 Start MenuThis is simple. Open Control Panel and right-click on Windows Update and select Pin to Start. You will see the shortcut pinned to your Start.Pin Windows Update to the Windows 8/7 TaskbarTo do this, open Control Panel and then drag-and-drop Windows Update to your desktop. Alternatively, you could also select Create shortcut instead – and its shortcut will be created on your desktop.Now right-click on the icon and choose ‘Properties’. Then, under the ‘Shortcut tab’ enter the following address for the Target field:cmd /c wuapp.exeIf this does not work for you, and you are unable to change the Target field, then do the following instead. Delete the just-created desktop shortcut. Now, right-click on Desktop > New > Shortcut.In the location path, type the following, name it Windows Update and click Next:cmd /c wuapp.exeA desktop shortcut will be created. Now right-click on the icon and choose ‘Properties’.Under the Shortcut tab, change the ‘Run’ menu to ‘Minimized‘. Click OK.Next, click on Change icon and enter the icon path as:%SystemRoot%\system32\wucltux.dllClick Apply/OK. The icon will change.Finally, right-click on the Windows Update icon on your Desktop screen. You should find
2025-03-28