Auto screen capture 2 3 3 2
Author: s | 2025-04-24

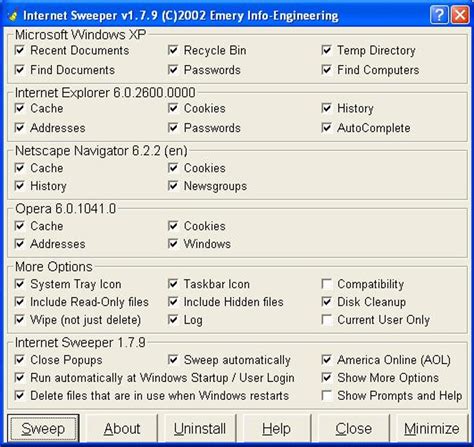
Auto Screen Capture 2.4.2.3. Fecha Publicado: 23 abr. 2025 (hace 2 a os) Descargar. Auto Screen Capture 2.4.2.2. Fecha Publicado: 21 abr. 2025 (hace 2 a os) Descargar. Auto Screen Capture 2.4.1.9. Fecha Publicado: 31 mar. 2025 (hace 3 a os) Descargar. Auto Screen Capture 2.4.1.8. Fecha Publicado: 07 mar. 2025 (hace 3 a os) 1. 2; 3
Auto Screen Capture 2. - TaiMienPhi.VN
Capture tool or OCR (Optical Character Recognition). Once activated, click and select the region on your screen from where you wish to capture the text. Step 2: Click Yes to allow ShareX to use the online API to recognize on-screen characters. ShareX will now access its servers and display you a result of the recognized text accordingly. Step 3: You can now copy all the text from the text box below and use it how you wish on your PC. You can also click on the drop-down menu in the top right corner to change the translation service if you’re trying to capture a language unknown to you. Method 7: Auto-capturing screenshotsAuto-captures can help you capture multiple screenshots for a region in a single go. This can also be used for full-screen screenshots and can be used to capture your actions on-screen. They can also be used to capture steps easily as a screenshot will be taken after a pre-determined set of time passes. Step 1: Use the hotkey we set earlier to activate the auto screen capture tool. Now click and select whether you wish to capture your entire screen or a custom-selected region. To select a custom region, click Select region and select the desired region on your screen. Step 2: Next, select your Repeat time. A screenshot will be taken each time this set period comes to an end. Step 3: Click Start once you are done. Step 4: You can now start performing the on-screen tasks you wish to capture. ShareX will automatically capture screenshots when the set period comes to an end each time. Step 5: Once you are done and would like to end the Auto capture task, then press the hotkey for the same again and click Stop. And that’s how you can use Auto Capture within ShareX to your advantage. Alternatively, you can also click on Capture > Auto capture from the ShareX app to activate auto-capture.Method 8: Capturing delayed screenshotsDelayed screenshots allow you to add a delay to your actions of taking a screenshot. This includes all the screen capturing options. Auto Screen Capture 2.4.2.3. Fecha Publicado: 23 abr. 2025 (hace 2 a os) Descargar. Auto Screen Capture 2.4.2.2. Fecha Publicado: 21 abr. 2025 (hace 2 a os) Descargar. Auto Screen Capture 2.4.1.9. Fecha Publicado: 31 mar. 2025 (hace 3 a os) Descargar. Auto Screen Capture 2.4.1.8. Fecha Publicado: 07 mar. 2025 (hace 3 a os) 1. 2; 3 Auto Screen Capture 2.4.2.2. Fecha Publicado: 21 abr. 2025 (hace 2 a os) Descargar. Auto Screen Capture 2.4.2.1. Fecha Publicado: 06 abr. 2025 (hace 3 a os) Descargar. Auto Screen Capture 2.4.1.9. Fecha Publicado: 31 mar. 2025 (hace 3 a os) Descargar. Auto Screen Capture 2.4.1.8. Fecha Publicado: 07 mar. 2025 (hace 3 a os) 1. 2; 3 Auto Screen Capture 2.5.1.1. Date released: (one year ago) Download. Auto Screen Capture 2.5.1.0. Date released: (2 years ago) Auto Screen Capture 2.4.2.3. Date released: (3 years ago) Download. Auto Screen Capture 2.4.2.2. Date released: (3 years ago) Download. Auto Screen Capture 2.5.1.4. Date released: (one year ago) Download. Auto Screen Capture 2.5.1.3. Date released: (2 years ago) Auto Screen Capture 2.4.2.3. Date released: (3 years ago) Download. Auto Screen Capture 2.4.2.2. Date released: (3 years ago) Download. Auto Screen Capture 2.5.1.1. Date released: (one year ago) Download. Auto Screen Capture 2.5.1.0. Date released: (2 years ago) Auto Screen Capture 2.4.2.2. Date released: (3 years ago) Download. Auto Screen Capture 2.4.2.1. Date released: (3 years ago) Download. Auto Screen Capture 2.5.1.1. Date released: (one year ago) Download. Auto Screen Capture 2.5.1.0. Date released: (2 years ago) Auto Screen Capture 2.4.2.2. Date released: (2 years ago) Download. Auto Screen Capture 2.4.2.1. Date released: (3 years ago) Download. Record none of them as you like. You can also set auto split, auto recording with various functions on the interface.Step 3. Then, you can click the red "REC" button to start recording. Here will be a menu bar on your screen. To pause the recording, click on the white double vertical bar; to end the recording, click on the red square sign.Step 4. After recording, you will be led to the list interface. Here you can view or edit your recordings. To start a new recording, just click on the "REC" button on the top of the interface.Share this article on your social media platforms.Method 2. Screen Record on Samsung Laptop with OBS StudioOBS Studio is an open-source screen recorder and live broadcast software for Windows, macOS, and Linux. This screen recording app supports capturing Samsung laptop screens and can record streaming videos to other popular platforms like YouTube, Twitch, Facebook, etc. It can capture and mix video and audio resources in real time. You can create and set multiple scenes and customize transitions to seamlessly switch between scenes to make your recording transitions smoother.Here are the steps to record Samsung PC screens:Step 1. Install and Launch OBS Studio, and choose the Scenes tab to click the + icon to add a scene.Step 2. Choose the Sources tab and click the + icon to add Display Capture or Browser as the source.Step 3. Click the Setting icon in the Audio Mixer tab and adjust the audio.Step 4. Click the Start Recording button in the Controls tab.Step 5. Click Stop Recording to finish your recording.Method 3. Using Xbox Game Bar to Record Samsung LaptopXbox Game Bar is an inbuilt screen recording tool for Samsung laptops on Windows 11 or 11. For users who don't want to install additional software, XboxComments
Capture tool or OCR (Optical Character Recognition). Once activated, click and select the region on your screen from where you wish to capture the text. Step 2: Click Yes to allow ShareX to use the online API to recognize on-screen characters. ShareX will now access its servers and display you a result of the recognized text accordingly. Step 3: You can now copy all the text from the text box below and use it how you wish on your PC. You can also click on the drop-down menu in the top right corner to change the translation service if you’re trying to capture a language unknown to you. Method 7: Auto-capturing screenshotsAuto-captures can help you capture multiple screenshots for a region in a single go. This can also be used for full-screen screenshots and can be used to capture your actions on-screen. They can also be used to capture steps easily as a screenshot will be taken after a pre-determined set of time passes. Step 1: Use the hotkey we set earlier to activate the auto screen capture tool. Now click and select whether you wish to capture your entire screen or a custom-selected region. To select a custom region, click Select region and select the desired region on your screen. Step 2: Next, select your Repeat time. A screenshot will be taken each time this set period comes to an end. Step 3: Click Start once you are done. Step 4: You can now start performing the on-screen tasks you wish to capture. ShareX will automatically capture screenshots when the set period comes to an end each time. Step 5: Once you are done and would like to end the Auto capture task, then press the hotkey for the same again and click Stop. And that’s how you can use Auto Capture within ShareX to your advantage. Alternatively, you can also click on Capture > Auto capture from the ShareX app to activate auto-capture.Method 8: Capturing delayed screenshotsDelayed screenshots allow you to add a delay to your actions of taking a screenshot. This includes all the screen capturing options
2025-04-01Record none of them as you like. You can also set auto split, auto recording with various functions on the interface.Step 3. Then, you can click the red "REC" button to start recording. Here will be a menu bar on your screen. To pause the recording, click on the white double vertical bar; to end the recording, click on the red square sign.Step 4. After recording, you will be led to the list interface. Here you can view or edit your recordings. To start a new recording, just click on the "REC" button on the top of the interface.Share this article on your social media platforms.Method 2. Screen Record on Samsung Laptop with OBS StudioOBS Studio is an open-source screen recorder and live broadcast software for Windows, macOS, and Linux. This screen recording app supports capturing Samsung laptop screens and can record streaming videos to other popular platforms like YouTube, Twitch, Facebook, etc. It can capture and mix video and audio resources in real time. You can create and set multiple scenes and customize transitions to seamlessly switch between scenes to make your recording transitions smoother.Here are the steps to record Samsung PC screens:Step 1. Install and Launch OBS Studio, and choose the Scenes tab to click the + icon to add a scene.Step 2. Choose the Sources tab and click the + icon to add Display Capture or Browser as the source.Step 3. Click the Setting icon in the Audio Mixer tab and adjust the audio.Step 4. Click the Start Recording button in the Controls tab.Step 5. Click Stop Recording to finish your recording.Method 3. Using Xbox Game Bar to Record Samsung LaptopXbox Game Bar is an inbuilt screen recording tool for Samsung laptops on Windows 11 or 11. For users who don't want to install additional software, Xbox
2025-04-20Shooting abilities. While it's an exciting game, it's not accessible on computers.To live stream Call of Duty: Mobile on the computer, you may use the detailed guide below:Screen Mirroring Software: Kingshiper Screen MirroringStreaming Software: OBS StudioStep 1. Use a USB cable to mirror your phone to a computer with Kingshiper Screen Mirroring.Step 2. Launch OBS Studio and enter the keystream code your copied from the social media platform where you’re going to stream.Step 3. Under the “Source” tab, click the “+” icon and choose “Window Capture”.Step 4. Click “Create New” and tap “OK”. Then, choose “[KSScreenMirror.exe]” on the Windows field droplist. Now you can start streaming.How to Live Stream on Instagram on PCStreaming on Instagram is exciting and allows you to show your creativity and engage with your followers in an enjoyable manner. However, streaming from your phone can be inconvenient, especially for extended periods. By using Kingshiper Screen Mirroring, you can effortlessly live stream on Instagram directly from your PC. Here are the detailed steps on how to live stream on Instagram on your computer:Screen Mirroring Software: Kingshiper Screen MirroringStreaming Software: OBS StudioStep 1. Mirror your phone to a computer with Kingshiper Screen Mirroring.Step 2. Upon logging into your Instagram account on your PC, open OBS Studio and enter the keystream code.Step 3. Under the Source tab, click “+” icon and select “Window Capture”.Step 4. Select “Create new” and tap “OK”.Step 5. Under the window drop list, select “[KSScreenMirror]: your device name”. and then click “OK”.How to Live Stream on FacebookSharing videos on social media, like Facebook, is a great way to share your ideas, content, or products quickly and easily. It's an effective method for spreading information fast. With Kingshiper Screen Mirroring, you can now live stream on Facebook easily from your PC.Here are the detailed steps on how to live stream on Facebook:Screen Mirroring Software: Kingshiper Screen MirroringStreaming Software: OBS StudioStep 1. Mirror your phone to the PC with Kingshiper Screen Mirroring.Step 2. Install OBS Studio on your PC. Click “Tools” on the top menu and tap “Auto-Configuration Wizard”. Choose the first option and click “Next”.Step 3. Select “Facebook Live” and enter your Stream Key. Then, click “Next”.Step 4. Click “+” icon under the Sources bar and tap “Windows Capture”.Step 5. Select “[KSScreen Mirror.exe]your device name” in the Window. Click “OK” and now you can live stream on Facebook on your computer.ConclusionThe above methods are the best
2025-04-21